Three years ago, my black plastic spoon melted in hot gravy. Buying a cheap kitchen utensil set ruined our whole pan of food. I smelled burnt plastic and tossed dinner in the trash.
Since that night, I have tested five tool bundles at home. I seared steaks at 500°F and scraped eggs off hot iron. Here is what works every day and what wastes your cash.
Why My First Kitchen Utensil Set Confused Me So Much
Most big tool bundles pack cheap filler items to look like a bargain. You pay for thirty tools when you only use six each day.
My first box had thirty-five shiny pieces inside it. Half of that count came from thin plastic spoons and wire rings. Watch out for these three traps before you buy a box:
- Cheap box fillers: Skip boxes that count wire hooks or bag clips as full tools.
- Weak neck joints: Avoid thin plastic necks that bend in thick pots of beef stew.
- Rough seam edges: Pass on molded plastic with sharp lines that scratch coated pans.
- Hollow metal handles: Skip thin steel tubes that fill up with dirty sink water.
How Piece Counts Trick You Into Buying Junk
Brands inflate box numbers by counting lids, racks, and tiny clips as tools. I tested five tool types for sixty days to find the best value.
| Option I Tried | Best Use Case | My Honest Verdict |
|---|---|---|
| One-piece silicone | Nonstick pans and hot sauces | My top pick for daily cooking |
| Hard maple wood | Thick stews and cast iron | Great grip but needs hand washing |
| Heavy stainless steel | Seared meats and steel pans | Lasts forever but scratches nonstick |
| Black nylon plastic | Cold bowls and salad tossing | Melts fast on hot pan rims |
| Cheap bamboo | Light stir-fries and toast | Splits fast when soaked in water |
My Early Lesson: I hid twenty-two extra tools in a closet bin for one month. I never missed a single one of them during thirty home dinners.
How a Kitchen Utensil Set Holds Up to Daily Heat
Good tools use a steel core wrapped in silicone rated to 500°F. Cheap plastic softens at 350°F and leaves melted curls in your food.
When I brown beef, my iron skillet hits 450°F in three minutes. If I rest a nylon spoon on the rim, the neck droops fast. High-heat rubber stays firm even when I scrape crust off hot steel.
The 6 Core Tools I Reach For Every Night
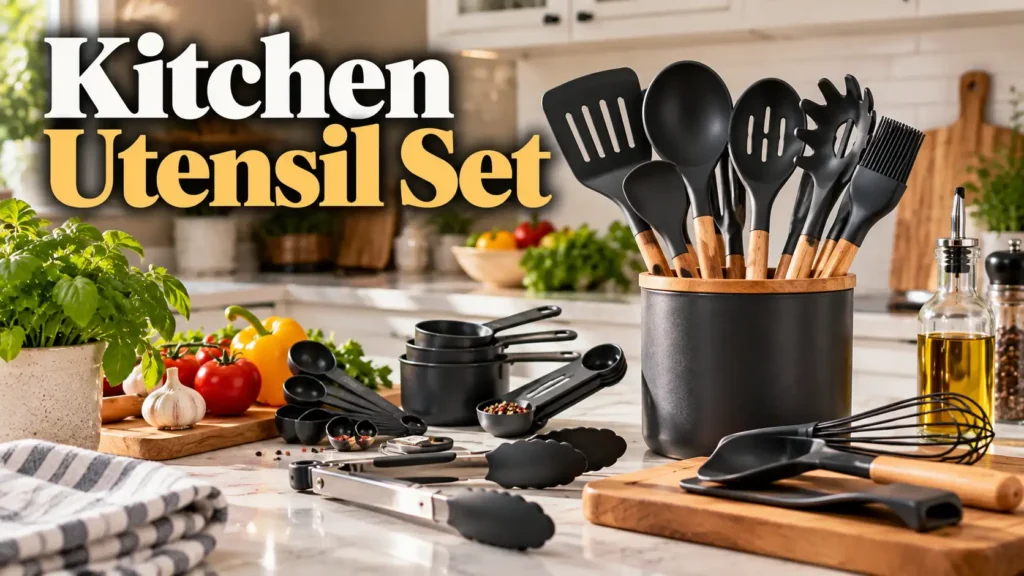
Six sturdy workhorses handle nine out of ten meals I cook at home. If your kitchen utensil set nails these six pieces, skip the rest.
- Slotted turner: Pick a thin edge that slides under fried eggs without tearing yolks.
- Solid spoon: Grab a deep bowl that holds two big spoons of thick sauce.
- Locking tongs: Choose twelve-inch steel tongs with rubber tips and a firm pull ring.
- Stiff scraper: Use a one-piece rubber blade to clean out sticky peanut butter jars.
- Deep ladle: Find a four-ounce cup with a flared rim that pours clean.
- Balloon whisk: Pick eight thick wires with a sealed handle so water stays out.
These six are the heart of the 20 tools I use weekly.
| Size / Scenario | Exact Amount | How Often |
|---|---|---|
| Silicone heat limit | 450°F to 600°F max | Every hot stove meal |
| Safe handle length | 12 to 13.5 inches | Daily to stop steam burns |
| Counter crock width | 6 inches wide minimum | Holds 6 to 8 tools |
| Pan rest time | 0 seconds on rim | Never leave tools in pans |
| Wood oil coat | 1 teaspoon food oil | Once every 30 days |
Why Handle Seams Trap Old Food and Grease
Two-piece tools trap dirty sink water inside the narrow neck joint. One-piece molded tools stop black mold and sour smells from growing inside.
Last spring, my two-piece scraper smelled like sour milk during dinner prep. I pulled the rubber head off the wood stick and found dark mold. Since that day, I only buy tools molded from one solid piece.
Safety Warning: Pull hard on two-piece spatula heads once a month over the sink. If the head wiggles or smells sour, toss it in the trash.
Big Myths I Busted While Testing My Tools
Store tags claim every tool is machine safe and gentle on all pans. My stove tests proved half of those popular tips dead wrong.
I ruined a forty-dollar pan by trusting a rough nylon turner. The melted plastic edge dried like sharp glass after one hot sear. Next time I cooked eggs, that rough tip carved tracks in my pan.
| Common Advice | My Real-World Test | Better Move |
|---|---|---|
| Nylon never scratches pans | Melted burrs gouged my skillet | Buy smooth silicone turners instead |
| All silicone is pure | Cheap heads turned white when bent | Pinch rubber to check quality |
| Wood holds meat germs | Dry maple killed germs fast | Hand wash wood with soap |
| Metal tongs work anywhere | Steel teeth chipped my pot | Use rubber tips on nonstick |
| Big sets save money | Half the box broke fast | Buy 6 strong core tools |
Does Dishwasher Heat Ruin a Kitchen Utensil Set?
High wash heat cracks wood handles and leaves soapy film on rubber. Hand washing takes one minute and doubles the life of your gear.
Washer jets hit 140°F and blast tools with harsh soap pods for hours. That heat strips natural oil from wood and makes rubber taste like soap. Check the chart below to see how I fixed my early mistakes.
| My Early Mistake | What Happened | What I Do Now |
|---|---|---|
| Left spoon in hot pan | Handle melted over the side | Rest tools on a plate |
| Washed wood in machine | Maple handle split in half | Scrub by hand and dry |
| Used scented soap pods | Eggs tasted like lemon soap | Wash rubber with plain soap |
| Kept 30 tools in drawer | Metal whisk jammed the track | Store 6 tools in a crock |
| Stirred stiff dough with whisk | Thin wires bent and snapped | Mix dough with thick wood |
My 20-Minute Fix: Bake smelly rubber tools on a sheet pan at 250°F for twenty minutes. Wipe off the warm oil beads and wash with plain liquid soap.
Who Needs a Full Bundle and Who Should Skip It
New cooks need a six-piece starter box, while pros should buy single tools. Matching your tools to your pans saves money and drawer space.
When I moved into my first flat, one small box saved me hours. Now that I cook on both steel and coated pans, I mix types. Use this quick list to see which path fits your stove best:
- Buy a boxed set: Great when you get new nonstick pans and need safe tools.
- Skip the big bundle: Pass if you already own good tongs and wood spoons.
- Pick heavy steel tools: Best if you only use cast iron or bare steel pans.
- Choose hard wood spoons: Ideal if you cook thick chili, stew, or tomato sauce.
Warning Signs Your Current Tools Need the Trash
Peeling edges, white stress lines, and loose heads mean your tools are unsafe. Fix minor smells at the sink, but toss melted tips right away.
| Warning Sign | Real Cause | My 2-Minute Fix |
|---|---|---|
| White film on rubber | Hard water mixed with oil | Rub with fresh lemon juice |
| Rough burrs on turner | Hot pan melted the tip | Toss out right away |
| Fuzzy dry wood grain | Hot water raised wood grain | Sand smooth and rub oil |
| Tongs will not lock | Loose metal spring tab | Pinch ring tight with pliers |
| Garlic smell on rubber | Oil soaked into cheap pores | Soak in baking soda paste |
Store Test Trick: Twist any silicone spatula head before you put it in your cart. If white lines show up in the bend, cheap fillers are inside.
My 3-Step Plan to Pick and Care for Your Gear
You can build a clean, clutter-free stove setup in less than fifteen minutes. Follow my three simple steps to upgrade your cooking tools today.
- Clear your top drawer: Dump every tool out and toss melted or cracked pieces.
- Pick your daily six: Keep one turner, spoon, tongs, ladle, whisk, and jar scraper.
- Set up a crock: Put those six daily tools in a jar by the stove.
For the full lineup, see my kitchen tools list of the 20 tools I use weekly.
My Fast Weekly Wash and Oil Habit
Ten minutes of Sunday care keeps wood smooth and rubber free of grease. I run this fast sink habit right after I wash Sunday dinner plates.
- Fill a warm sink: Mix one gallon of hot water with two spoons of baking soda.
- Soak the rubber heads: Let silicone tools sit ten minutes to loosen baked-on oil.
- Scrub and dry flat: Brush every handle seam with plain soap and dry with a towel.
- Oil the dry wood: Rub wood handles with four drops of food-safe mineral oil.
| Step | Time Needed | Key Shortcut |
|---|---|---|
| Purge broken tools | 2 minutes | Check tips under bright light |
| Baking soda soak | 10 minutes | Soak while wiping the stove |
| Scrub handle joints | 2 minutes | Use a stiff toothbrush |
| Dry steel hinges | 1 minute | Hang tongs open to dry |
| Oil wood spoons | 1 minute | Wipe on with paper towel |
Counter Setup Tip: Never cram more than seven tools into one counter crock. If wide heads tangle, you will tip the whole jar grabbing tongs.
FAQs for Kitchen Utensil Set
What is the safest material for daily cooking tools?
Food-grade silicone and hard wood are the safest picks for hot pans. They will not melt, scratch pans, or leak toxins into your food.
How many pieces do I really need for daily meals?
You only need 6 to 8 core tools for daily home cooking. Grab a turner, solid spoon, locking tongs, ladle, whisk, and jar scraper.
Can I use metal tools on my nonstick pans?
Never use metal spoons or tongs on coated nonstick pans. Sharp steel edges scratch the slick pan coat and ruin it in weeks.
How do I get white soap film off silicone spoons?
Soak stained silicone in hot water, baking soda, and lemon juice. Let the tools sit for 20 minutes to melt away baked-on grease.
How often should I replace my old cooking tools?
Replace your daily cooking tools every 2 to 5 years. Toss any piece right away if you spot deep cracks, rot, or melted tips.
Why do my silicone spatulas taste like dish soap?
Scented dishwasher pods bond fast to trapped cooking oils on rubber. Hand wash your silicone tools with plain liquid soap and warm water.
What Testing Every Cooking Tool Taught Me
A small, high-heat kitchen utensil set beats a giant box of cheap plastic. Six solid tools make daily cooking faster, safer, and much cleaner. You do not need thirty gadgets to cook great meals at home.
Take five minutes right now to open your top stove drawer. Toss out any spoon with a melted tip or a loose head. Put your six best tools in a wide jar on the counter tonight.